
Introduction
ESP32 can create its own web server using WiFi connection.
In this tutorial, ESP32 hosts a webpage where users can:
- Turn LED ON/OFF
- View potentiometer sensor values
- Control ESP32 wirelessly using browser
Required Components
| Component | Quantity |
|---|---|
| ESP32 Board | 1 |
| LED | 1 |
| 220Ω Resistor | 1 |
| Potentiometer | 1 |
| Breadboard | 1 |
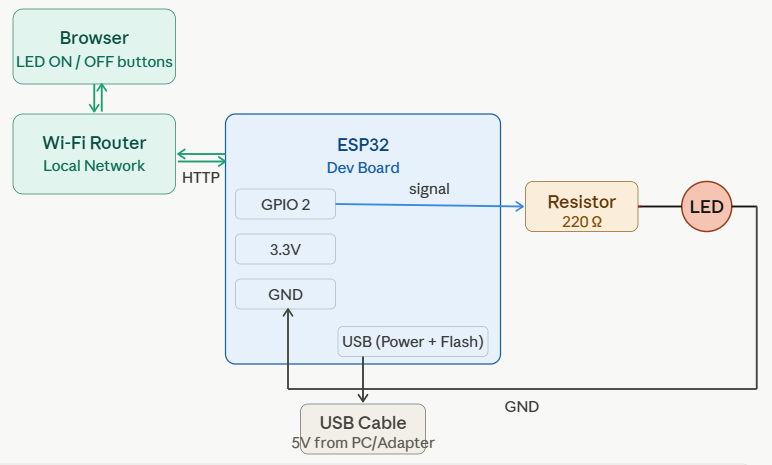
LED Connection
| ESP32 Pin | Connection |
|---|---|
| GPIO 2 | LED Positive Terminal |
| GND | LED Negative via Resistor |
Buy on Amazon
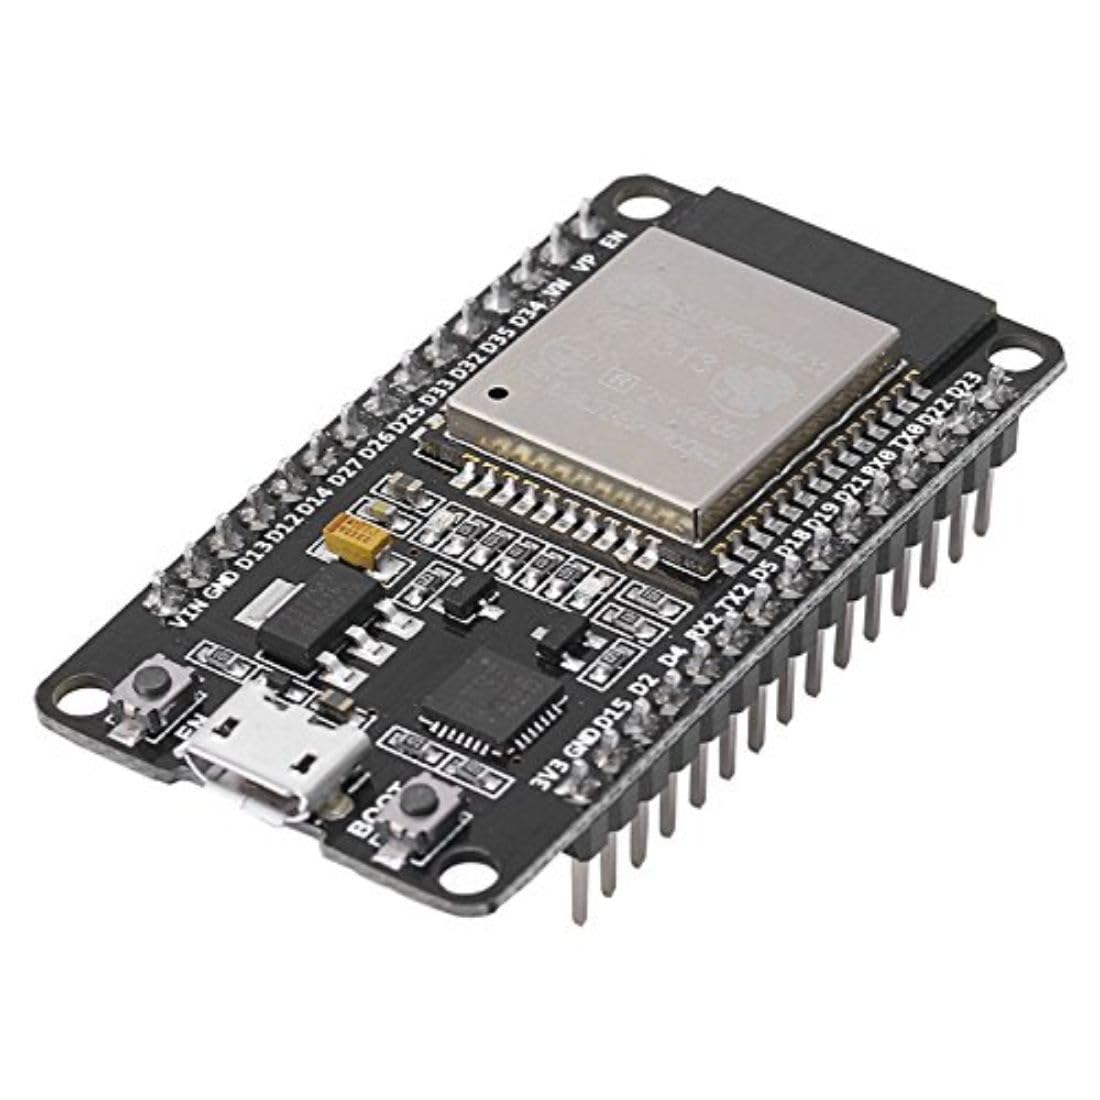
Potentiometer Connection
| Potentiometer Pin | ESP32 Connection |
|---|---|
| VCC | 3.3V |
| GND | GND |
| Middle Pin | GPIO 34 |
WiFi Setup
Replace WiFi credentials in the code:
const char* ssid = "YOUR_WIFI_NAME";
const char* password = "YOUR_WIFI_PASSWORD";
ESP32 Web Server Program
#include <WiFi.h>
#include <WebServer.h>
const char* ssid = "YOUR_WIFI_NAME";
const char* password = "YOUR_WIFI_PASSWORD";
WebServer server(80);
int ledPin = 2;
int potPin = 34;
bool ledState = false;
void handleRoot() {
  int potValue = analogRead(potPin);
  String html = "<html><body style='font-family:Arial;text-align:center;'>";
  html += "<h1>ESP32 Web Server</h1>";
  html += "<h2>Potentiometer Value: ";
  html += potValue;
  html += "</h2>";

  if(ledState){
    html += "<p>LED Status: ON</p>";
    html += "<a href='/off'><button style='padding:15px;'>Turn OFF</button></a>";
  }
  else{
    html += "<p>LED Status: OFF</p>";
    html += "<a href='/on'><button style='padding:15px;'>Turn ON</button></a>";
  }
  html += "</body></html>";
  server.send(200, "text/html", html);
}

void handleON() {
  digitalWrite(ledPin, HIGH);
  ledState = true;
  server.sendHeader("Location", "/");
  server.send(303);
}

void handleOFF() {

  digitalWrite(ledPin, LOW);
  ledState = false;

  server.sendHeader("Location", "/");
  server.send(303);
}
void setup() {
  Serial.begin(115200);
  pinMode(ledPin, OUTPUT);
  WiFi.begin(ssid, password);
  while(WiFi.status() != WL_CONNECTED){
    delay(1000);
    Serial.println("Connecting...");
  }
  Serial.println("WiFi Connected");
  Serial.println(WiFi.localIP());
  server.on("/", handleRoot);
  server.on("/on", handleON);
  server.on("/off", handleOFF);

  server.begin();

}

void loop() {

  server.handleClient();

}
Upload Steps
Step 1:
Connect ESP32 to computer using USB cable.
Step 2:
Select Board:
Tools > Board > ESP32 Dev Module
Step 3:
Select correct COM Port.
Step 4:
Upload the code to ESP32.
Open ESP32 Webpage
After uploading the code:
- Open Serial Monitor
- Set baud rate to 115200
- Copy the ESP32 IP Address
- Open IP address in browser
Example:
192.168.1.10
Output
- Webpage opens in browser
- LED ON/OFF button controls LED
- Potentiometer values update on webpage
- ESP32 works as wireless web server
Important Notes
- ESP32 and mobile/PC must be on same WiFi network.
- Use correct WiFi credentials.
- GPIO 34 is input-only analog pin.
- Refresh webpage to update sensor value.
Project
IoT based AC load control