/*
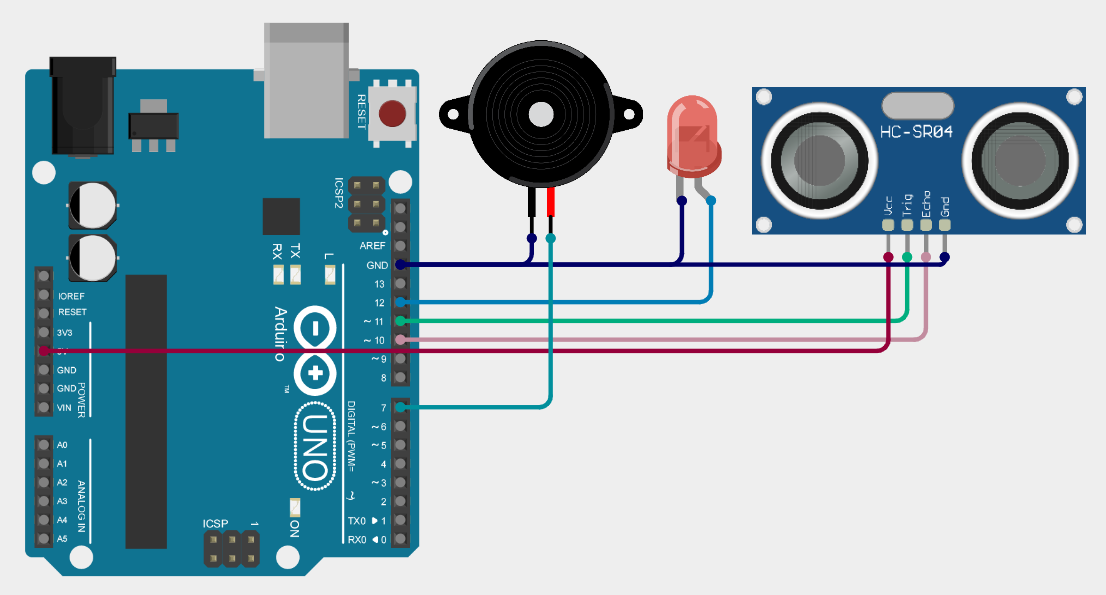
* Arduino Sketch for measuring distance using an HC-SR04 Ultrasonic Sensor.
* The circuit includes a Piezo Speaker and an LED that turn on when the
* measured distance is between 40 and 50 cm.
*/
#include <Wire.h>
#include <LiquidCrystal_I2C_Hangul.h>
// Pin definitions
#define TRIG_PIN 11 // Pin connected to HC-SR04 TRIG
#define ECHO_PIN 10 // Pin connected to HC-SR04 ECHO
#define LED_PIN 12 // Pin connected to the LED
#define BUZZER_PIN 7 // Pin connected to the Piezo Speaker
// LCD setup
LiquidCrystal_I2C_Hangul lcd(0x27, 16, 2); // LCD address 0x27, 16x2 display
void setup() {
lcd.init();
lcd.backlight();
pinMode(TRIG_PIN, OUTPUT);
pinMode(ECHO_PIN, INPUT);
pinMode(LED_PIN, OUTPUT);
pinMode(BUZZER_PIN, OUTPUT);
digitalWrite(LED_PIN, LOW);
digitalWrite(BUZZER_PIN, LOW);
}
void loop() {
long duration;
int distance;
// Clear the TRIG_PIN
digitalWrite(TRIG_PIN, LOW);
delayMicroseconds(2);
// Set the TRIG_PIN high for 10 microseconds
digitalWrite(TRIG_PIN, HIGH);
delayMicroseconds(10);
digitalWrite(TRIG_PIN, LOW);
// Read the ECHO_PIN, returns the sound wave travel time in microseconds
duration = pulseIn(ECHO_PIN, HIGH);
// Calculate the distance
distance = duration * 0.034 / 2;
// Display distance on LCD
lcd.clear();
lcd.setCursor(0, 0);
lcd.print("Distance: ");
lcd.print(distance);
lcd.print(" cm");
// Check if distance is between 40 and 50 cm
if (distance >= 40 && distance <= 50) {
digitalWrite(LED_PIN, HIGH); // Turn on LED
digitalWrite(BUZZER_PIN, HIGH);// Turn on Buzzer
} else {
digitalWrite(LED_PIN, LOW); // Turn off LED
digitalWrite(BUZZER_PIN, LOW); // Turn off Buzzer
}
delay(1000); // Wait 1 second before next reading
}
Get an official Project Completion Certificate with a unique ID & QR verification — perfect for internships, resumes, and college submissions.
Get Certificate →