What is HTML?
Okay, so this is the only bit of mandatory theory. In order to begin to write HTML, it helps if you know what you are writing.
HTML is the language in which most websites are written. HTML is used to create pages and make them functional.
The code used to make them visually appealing is known as CSS and we shall focus on this in a later tutorial. For now, we will focus on teaching you how to build rather than design.
The History of HTML
HTML was first created by Tim Berners-Lee, Robert Cailliau, and others starting in 1989. It stands for Hyper Text Markup Language.
Hypertext means that the document contains links that allow the reader to jump to other places in the document or to another document altogether. The latest version is known as HTML5.
A Markup Language is a way that computers speak to each other to control how text is processed and presented. To do this HTML uses two things: tags and attributes.
HTML Editors
Download Notepad ++ 32Bit
Download Notepad++ 64bit
Basic Construction of an HTML Page
These tags should be placed underneath each other at the top of every HTML page that you create.
<!DOCTYPE html> — This tag specifies the language you will write on the page. In this case, the language is HTML 5.
<html> — This tag signals that from here on we are going to write in HTML code.
<head> — This is where all the metadata for the page goes — stuff mostly meant for search engines and other computer programs.
<body> — This is where the content of the page goes.
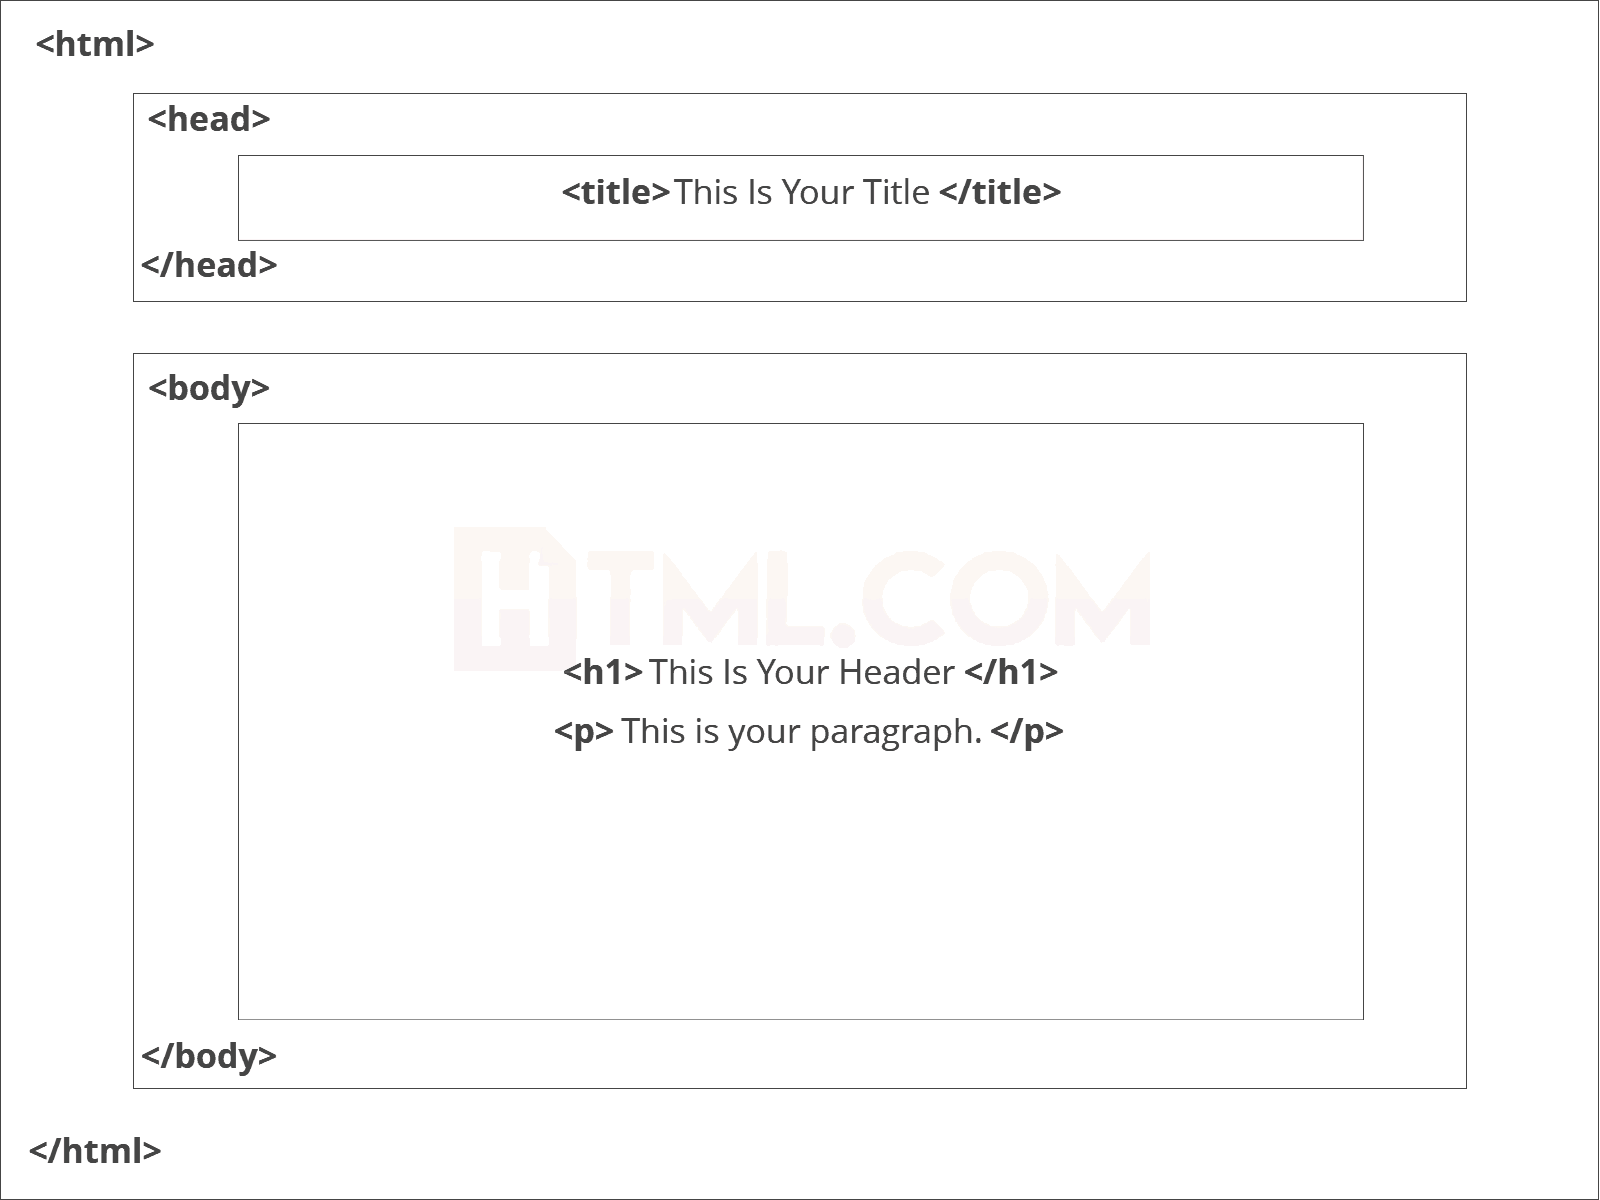
This is how your average HTML page is structured visually.
Further Tags
Inside the <head> tag, there is one tag that is always included: <title>, but there are others that are just as important:<title>This is where we insert the page name as it will appear at the top of the browser window or tab.<meta>This is where information about the document is stored: character encoding, name (page context), description.
Let’s try out a basic <head> section:
<head>
<title>My First Webpage</title>

</head>
Adding Content
Next, we will make <body> tag.
The HTML <body> is where we add the content which is designed for viewing by human eyes.
This includes text, images, tables, forms and everything else that we see on the internet each day.
How to Add HTML Headings To Your Web Page
In HTML, headings are written in the following elements:
<h1><h2><h3><h4><h5><h6>
As you might have guessed <h1> and <h2> should be used for the most important titles, while the remaining tags should be used for sub-headings and less important text.
Search engine bots use this order when deciphering which information is most important on a page.
Creating Your Heading
Let’s try it out. On a new line in the HTML editor, type:
<h1>Welcome to My Page</h1>
The Anchor Tag
The <a> (or anchor) opening tag is written in the format:
<a href="https://blogging.com/how-to-start-a-blog/">Your Link Text Here </a>
The first part of the attribute points to the page that will open once the link is clicked.
Meanwhile, the second part of the attribute contains the text which will be displayed to a visitor in order to entice them to click on that link.
If you are building your own website then you will most likely host all of your pages on professional web hosting. In this case, internal links on your website will <a href=”mylinkedpage.html”>Linktle Here</a>.
Let’s Create An Anchor Tag
Let’s try it out. Make a duplicate of the code from your current index.html page. Copy / paste it into a new window in your HTML editor.
Save this new page as “page2.html” and ensure that it is saved in the same folder as your index.html page.
On page2.html add the following code:
<a href="http://www.google.com">Google</a>
This will create a link to Google on page 2. Hit save and return to your index.html page.
How To Make an HTML List
In web design, there are 3 different types of lists which you may wish to add to your site.
Ordered List
The first is an <ol>: This is an ordered list of contents. For example:
- An item
- Another item
- Another goes here.
Inside the <ol> tag we list each item on the list inside <li> </li> tags.
For example:
<ol>
<li>An item </li>
<li>Another item </li>
<li>Another goes here </li>
</ol>
Unordered List
The second type of list that you may wish to include is an <ul> unordered list. This is better known as a bullet point list and contains no numbers.
An example of this is:
<ul>
<li>This is </li>
<li>An Unordered </li>
<li>List </li>
</ul>
How To Add Tables In HTML
An example of an HTML table is as follows:
<table>
<tr>
<td>Row 1 - Column 1</td>
<td>Row 1 - Colunm 2 </td>
<td>Row 1 - Column 3 </td>
</tr>
<tr>
<td>Row 2 - Column 1</td>
<td>Row 2 - Column 2</td>
<td>Row 2 - Column 3</td>
</tr>
</table>
How To Close an HTML Document
The final step we need to complete is to close the <body> and <html> tags at the end of each page using the following HTML code:
</body>
</html>
Practice the first page
Create 2 pages First is index.html and second is page2.html
Index.html code:
<!DOCTYPE html>
<html>
<head>
<title>My First Webpage</title>

</head>
<body>
<h1>Welcome to my webpage</h1>
<p>Welcome to <em>my</em> brand new website.</p>
<p>This site will be my <strong>new</strong> home on the web.</p>
<a href="/page2.html">Page2</a>
<img src="testpic.jpg" alt="This is a test image" height="42" width="42">
<p>This website will have the following benefits for my business:</p>
<ul>
<li>Increased traffic </li>
<li>Global Reach</li>
<li>Promotional Opportunities</li>
</ul>
<table>
<tr>
<td>Row 1 - Column 1</td>
<td>Row 1 - Column 2 </td>
</tr>
<tr>
<td>Row 2 - Column 1</td>
<td>Row 2 - Column 2</td>
</tr>
</table>
</body>
</html>
page2.html code:
<!DOCTYPE html>
<html>
<head>
<title>My First Webpage</title>
<meta charset="UTF-8">
<meta name="description" content="This is my first website. It includes lots of information about my life.">
</head>
<body>
<h1>Welcome to my webpage</h1>
<p>Welcome to <em>my</em> brand new website.</p>
<p>This site will be my <strong>new<strong> home on the web.</p>
<a href="http://www.google.com">Google</a>
</body>
</html>
IMAGE On Web Page
<img src=”img.jpg” alt=”My image” width=”500″ height=”600″>
Definition and Usage
The <img> tag is used to embed an image in an HTML page.
Images are not technically inserted into a web page; images are linked to web pages. The <img> tag creates a holding space for the referenced image.
The <img> tag has two required attributes:
- src – Specifies the path to the image
- alt – Specifies an alternate text for the image, if the image for some reason cannot be displayed
Note: Also, always specify the width and height of an image. If width and height are not specified, the page might flicker while the image loads.
Tip: To link an image to another document, simply nest the <img> tag inside an <a> tag
<img src=”image.jpg” width=”100″ height=”50″ >
Image Border
<img src=”image.jpg” width=”100″ height=”50″ style=”border:5px solid black”>
Hyperlink to image
How to add a hyperlink to an image:
<a href=”https://www.vsinformatics.org”>
<img src=”image.jpg” width=”100″ height=”50″>
</a>
BUTTON
<button type=”button” >Click Me!</button>
Java Script
JavaScript Can Change HTML Content
One of many JavaScript HTML methods is getElementById().
The example below “finds” an HTML element (with id=”demo”), and changes the element content (innerHTML) to “Hello JavaScript”:
Button code:-

< button type="button" onclick='document.getElementById("demo").innerHTML = "Hello JavaScript!"'>Click Me!</button >


Time button code
<button onclick="document.getElementById('demo').innerHTML = Date()">The time is?</button>

Function code for buttin : --
<button onclick="displayDate()">The time is?</button>

<script>
function displayDate() {
  document.getElementById("demo").innerHTML = Date();
}
</script>